


Collecting feedback on a website or a web app is much easier with a tool that is automaticallycollecting the screenshot, page address, browser and screen size.
I’ve tried a few paid tools that do this well, but I couldn’t justify a monthly fee for something I don’t use every week. So I’m now testing BugShot, a free, open-source browser extension. You click it, mark up a screenshot, write two lines, and it becomes a GitHub issue with all the details attached.

Reports land in a GitHub repository: a project’s home on GitHub, holding its files and its list of issues (tasks).
This settup requires a Github account and setting up the connection so if your reviewers are clients who would never sign up to GitHub, a paid tool or integration with different service may be a better choice.
What you’ll need
- Google Chrome or Microsoft Edge. BugShot doesn’t support Safari or Firefox.
- A free GitHub account.
- About 15 minutes for the one-off setup.
Part 1: Set up a feedback repository
Skip this part if you’re a reporter. The project owner will send you an invitation.
- Create a new private repository on GitHub just for reports, for example
my-project-feedback.- Set it to Private.
- Leave Issues switched on. That’s where reports land.
- Set up the labels. BugShot’s label picker shows the repository’s own labels. I use three:
- Bug: something is broken.
- Improvement: a change to design or behaviour.
- Content: copy or images to change.
GitHub adds nine default labels to every new repository. Delete the ones you don’t need so the picker stays short: Issues → Labels → Delete, and New label for anything missing.
- Invite your reporters.
- Go to Settings → Collaborators → Add people.
- On a personal GitHub account every collaborator gets write access. That’s fine here, because this repository holds no code.
- Send each reporter the link to the feedback repository and the BugShot setup guide (PDF), a short version of Parts 2 and 3.
Don’t add people to the code repository just so they can report bugs. That would let them change the code.
Part 2: Set up BugShot
1. Accept the invitation and sign in
Accept the project owner’s GitHub invitation from your email or GitHub notifications. Open the feedback repository to check you have access.
Stay signed in to github.com in the browser you’ll review the website in. BugShot needs this session to upload screenshots.
2. Install and pin BugShot
- Install BugShot from the Chrome Web Store.
- Click the puzzle-piece icon in the toolbar, then the pin next to BugShot.
The pinned icon is how you’ll start every report.
3. Make it run only when you click it
- Go to
chrome://extensions(oredge://extensionsin Edge). - Find BugShot and click Details.
- Under Site access, choose On specific sites.
- Click Add and enter
https://github.com.
BugShot needs to be able to run github.com automatically, which it needs for uploads. On other sites it only wakes up when you click its icon, and only for that tab with this setup.
4. Create a GitHub token
A personal access token (PAT) lets BugShot connect to your GitHub account. Its permissions determine what BugShot can access. Use one instead of BugShot’s OAuth option, which asks for full access to every repository you can reach.
Choose one option below.
Fine-grained token
You own the repository, or you’re a member of the organisation that owns it. This is the safer option.
- On GitHub: profile picture → Settings → Developer settings → Personal access tokens → Fine-grained tokens → Generate new token.
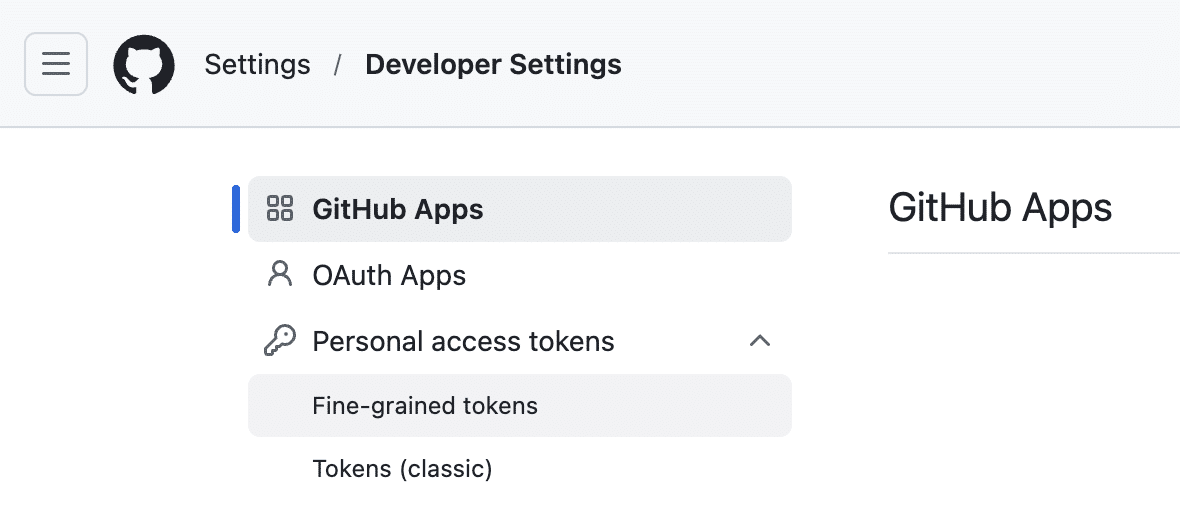
Fine-grained tokens are under Developer settings → Personal access tokens. - Token name:
BugShot – my-project-feedback. Expiration: 90 days. - Resource owner: select the account or organisation that owns the feedback repository. Without this, an organisation’s repository may not appear.
- Repository access: Only select repositories, then pick the feedback repository.
- Permissions: Add permissions → Issues → Read and write. GitHub adds Metadata: Read-only by itself.
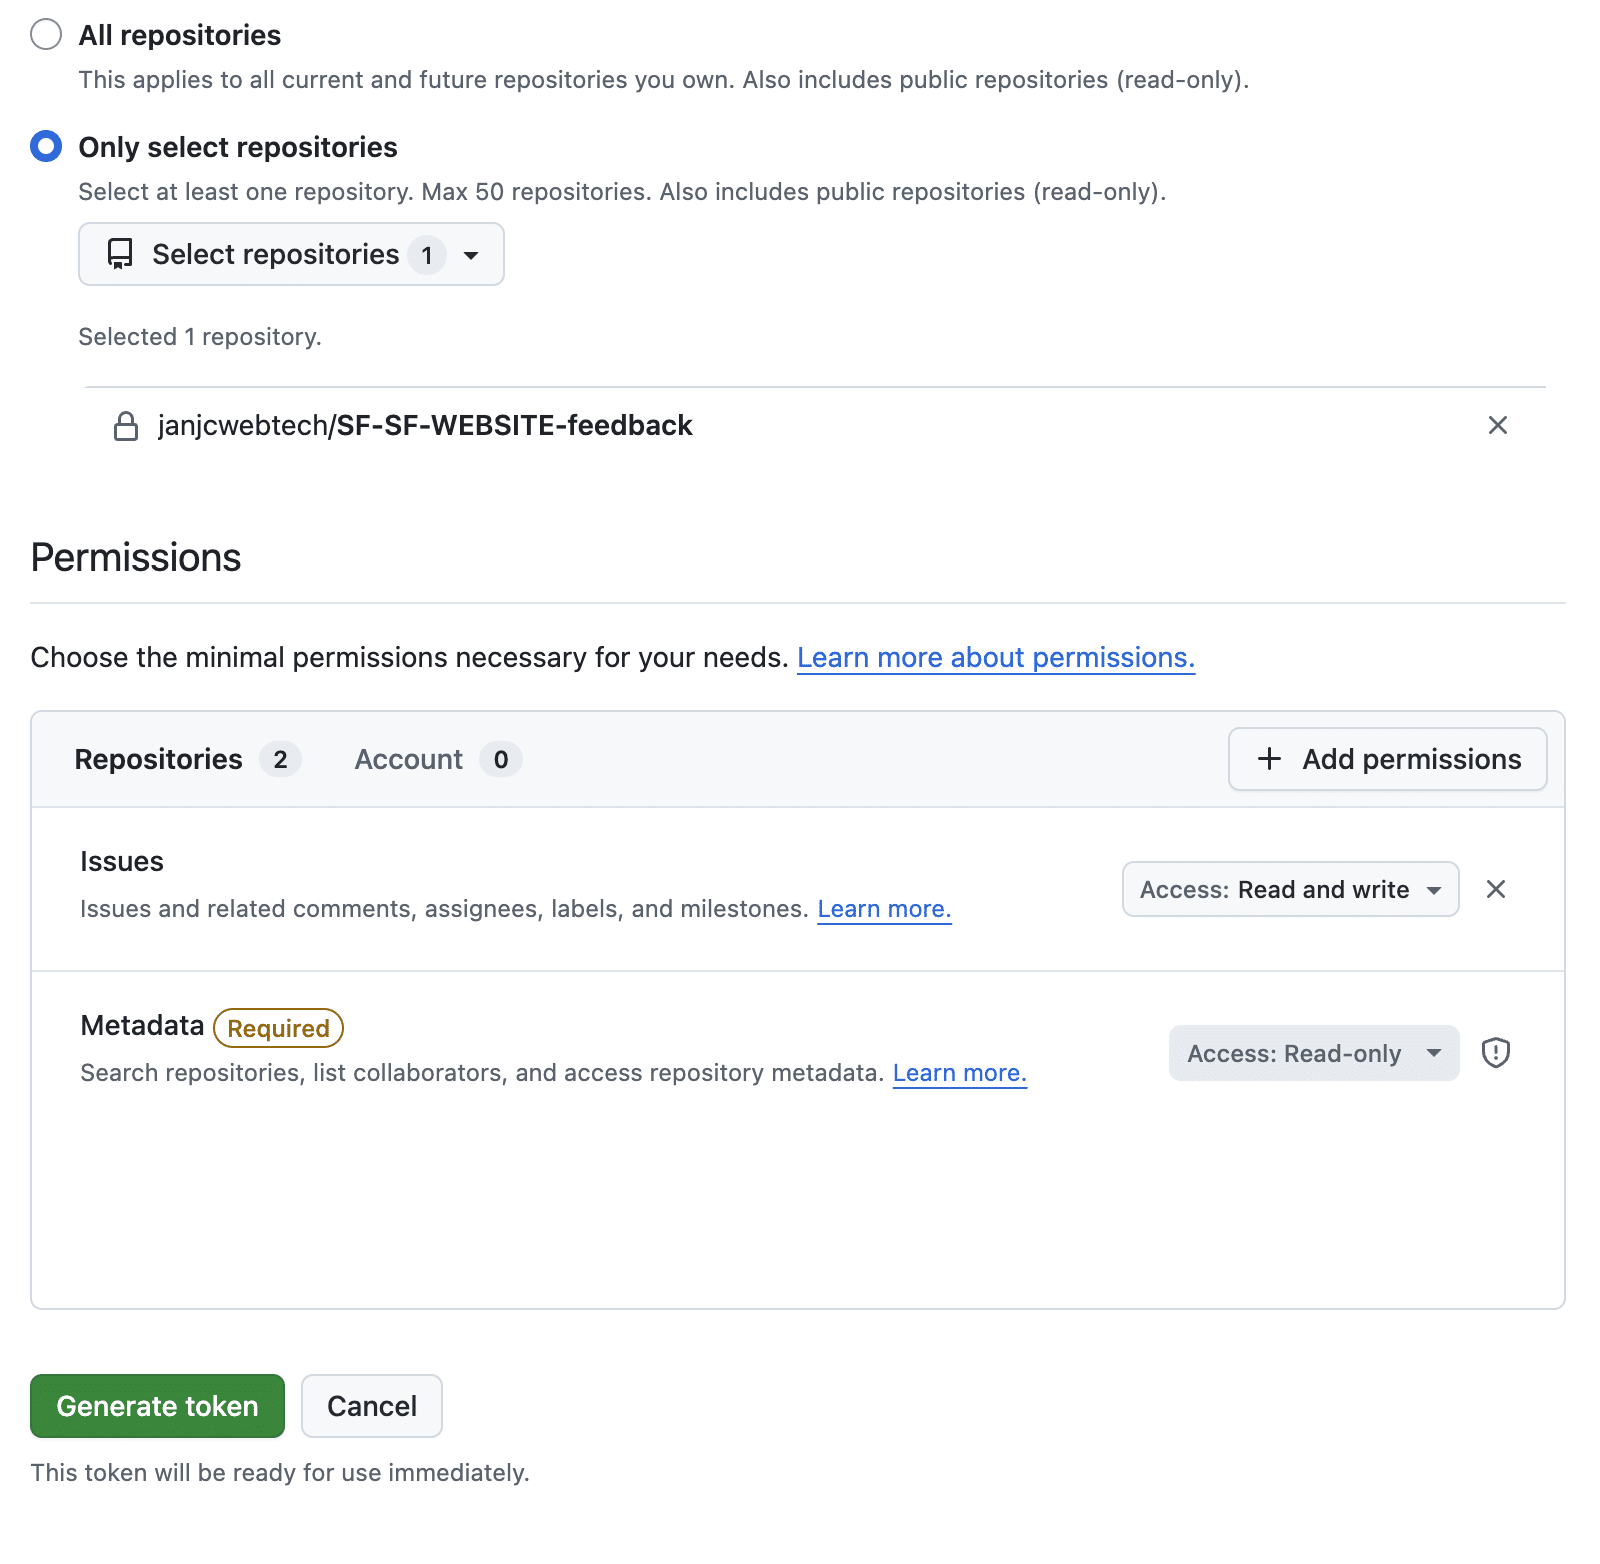
The token reaches one repository and can only read and write issues there. - Click Generate token and copy it. GitHub only shows it once.


If an organisation owns the repository, its owners may need to approve your token before it works.
Classic token
You’re a collaborator on someone else’s personal repository. GitHub doesn’t allow fine-grained tokens there. Outside collaborators on an organisation’s repository need a classic token too.
- Settings → Developer settings → Personal access tokens → Tokens (classic) → Generate new token (classic).
- Note:
BugShot. Expiration: 90 days. - Scopes: tick
repoanduser:email, then generate and copy the token.
A classic token works on every repository your account can access. Keep it private, don’t reuse it, and delete it when you stop testing.
5. Connect BugShot to GitHub
- Click the BugShot icon, or press Cmd+Shift+E (Mac) or Ctrl+Shift+E (Windows).
- Open the integrations tab (third icon along the top) → Add platform → GitHub.
- Choose PAT, paste your token and save.
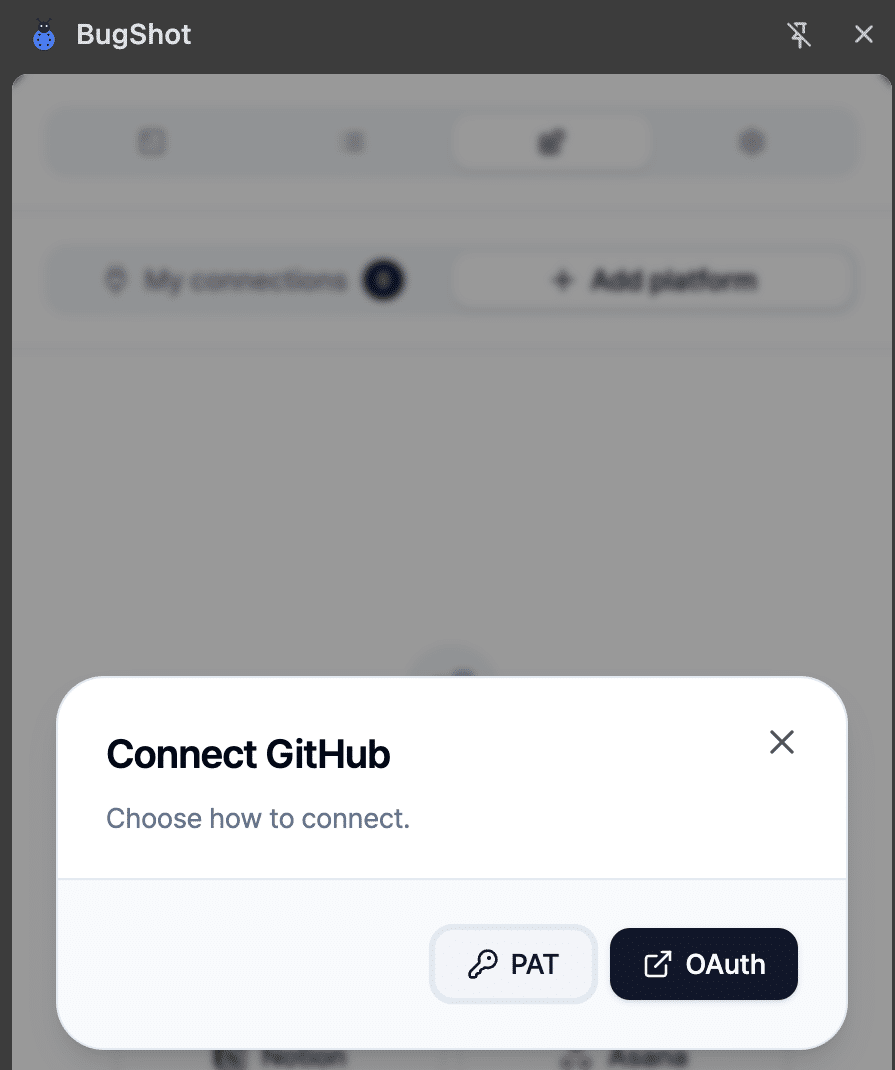
Choose PAT. OAuth asks for access to every repository you can reach. - Under My connections, set the feedback repository as the default Repository. You can set a default Label and Assignee too.
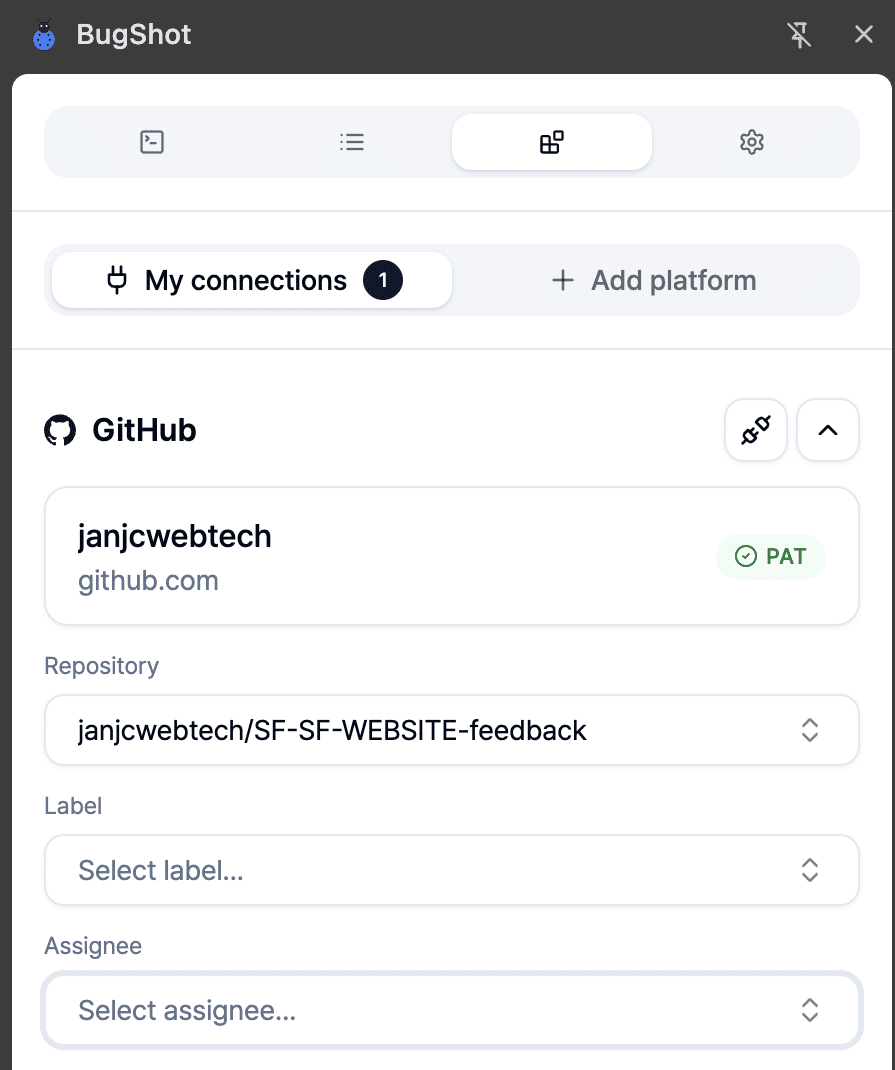
With the feedback repository as the default, every report lands in the right place.


Done, now you can start reporting
- Go to the page and click the BugShot icon. This gives it access to this tab only.
- Capture it. Choose Screenshot or Capture element, then draw boxes or arrows on the problem.
- Describe it.
- A short title, for example “Menu button overlaps logo on small screens”.
- In Description, what you expected and what happened.
- Steps to reproduce, if it only happens in specific situation
The page address, browser, operating system and screen size are added for you under Environment.
- Click Submit issue, check the Repository is your feedback one, pick a Label and confirm.
Keep your feedback repository selected. Other public repositories may appear in the dropdown.
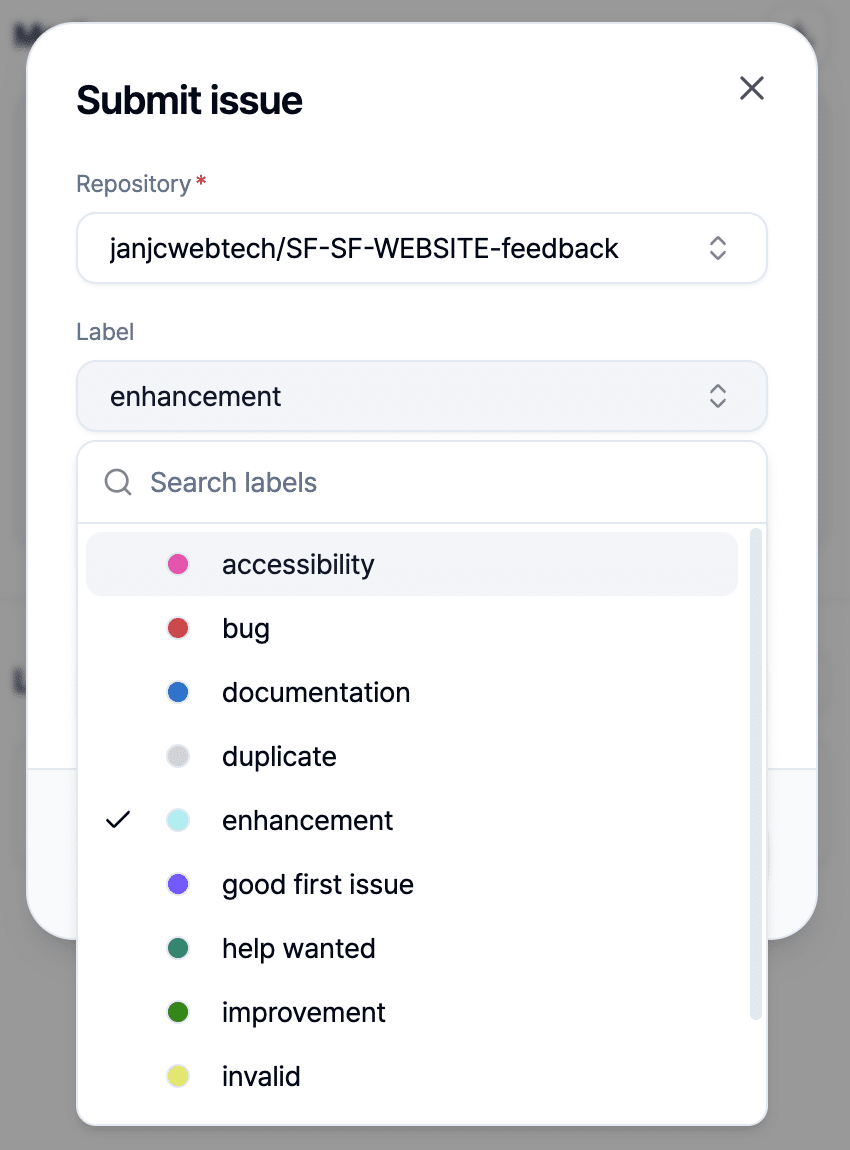
The labels come from the feedback repository, so reporters only see the ones you set up. - Open the new issue from the link BugShot shows. It has the environment details, your description and the screenshot, ready for the team.
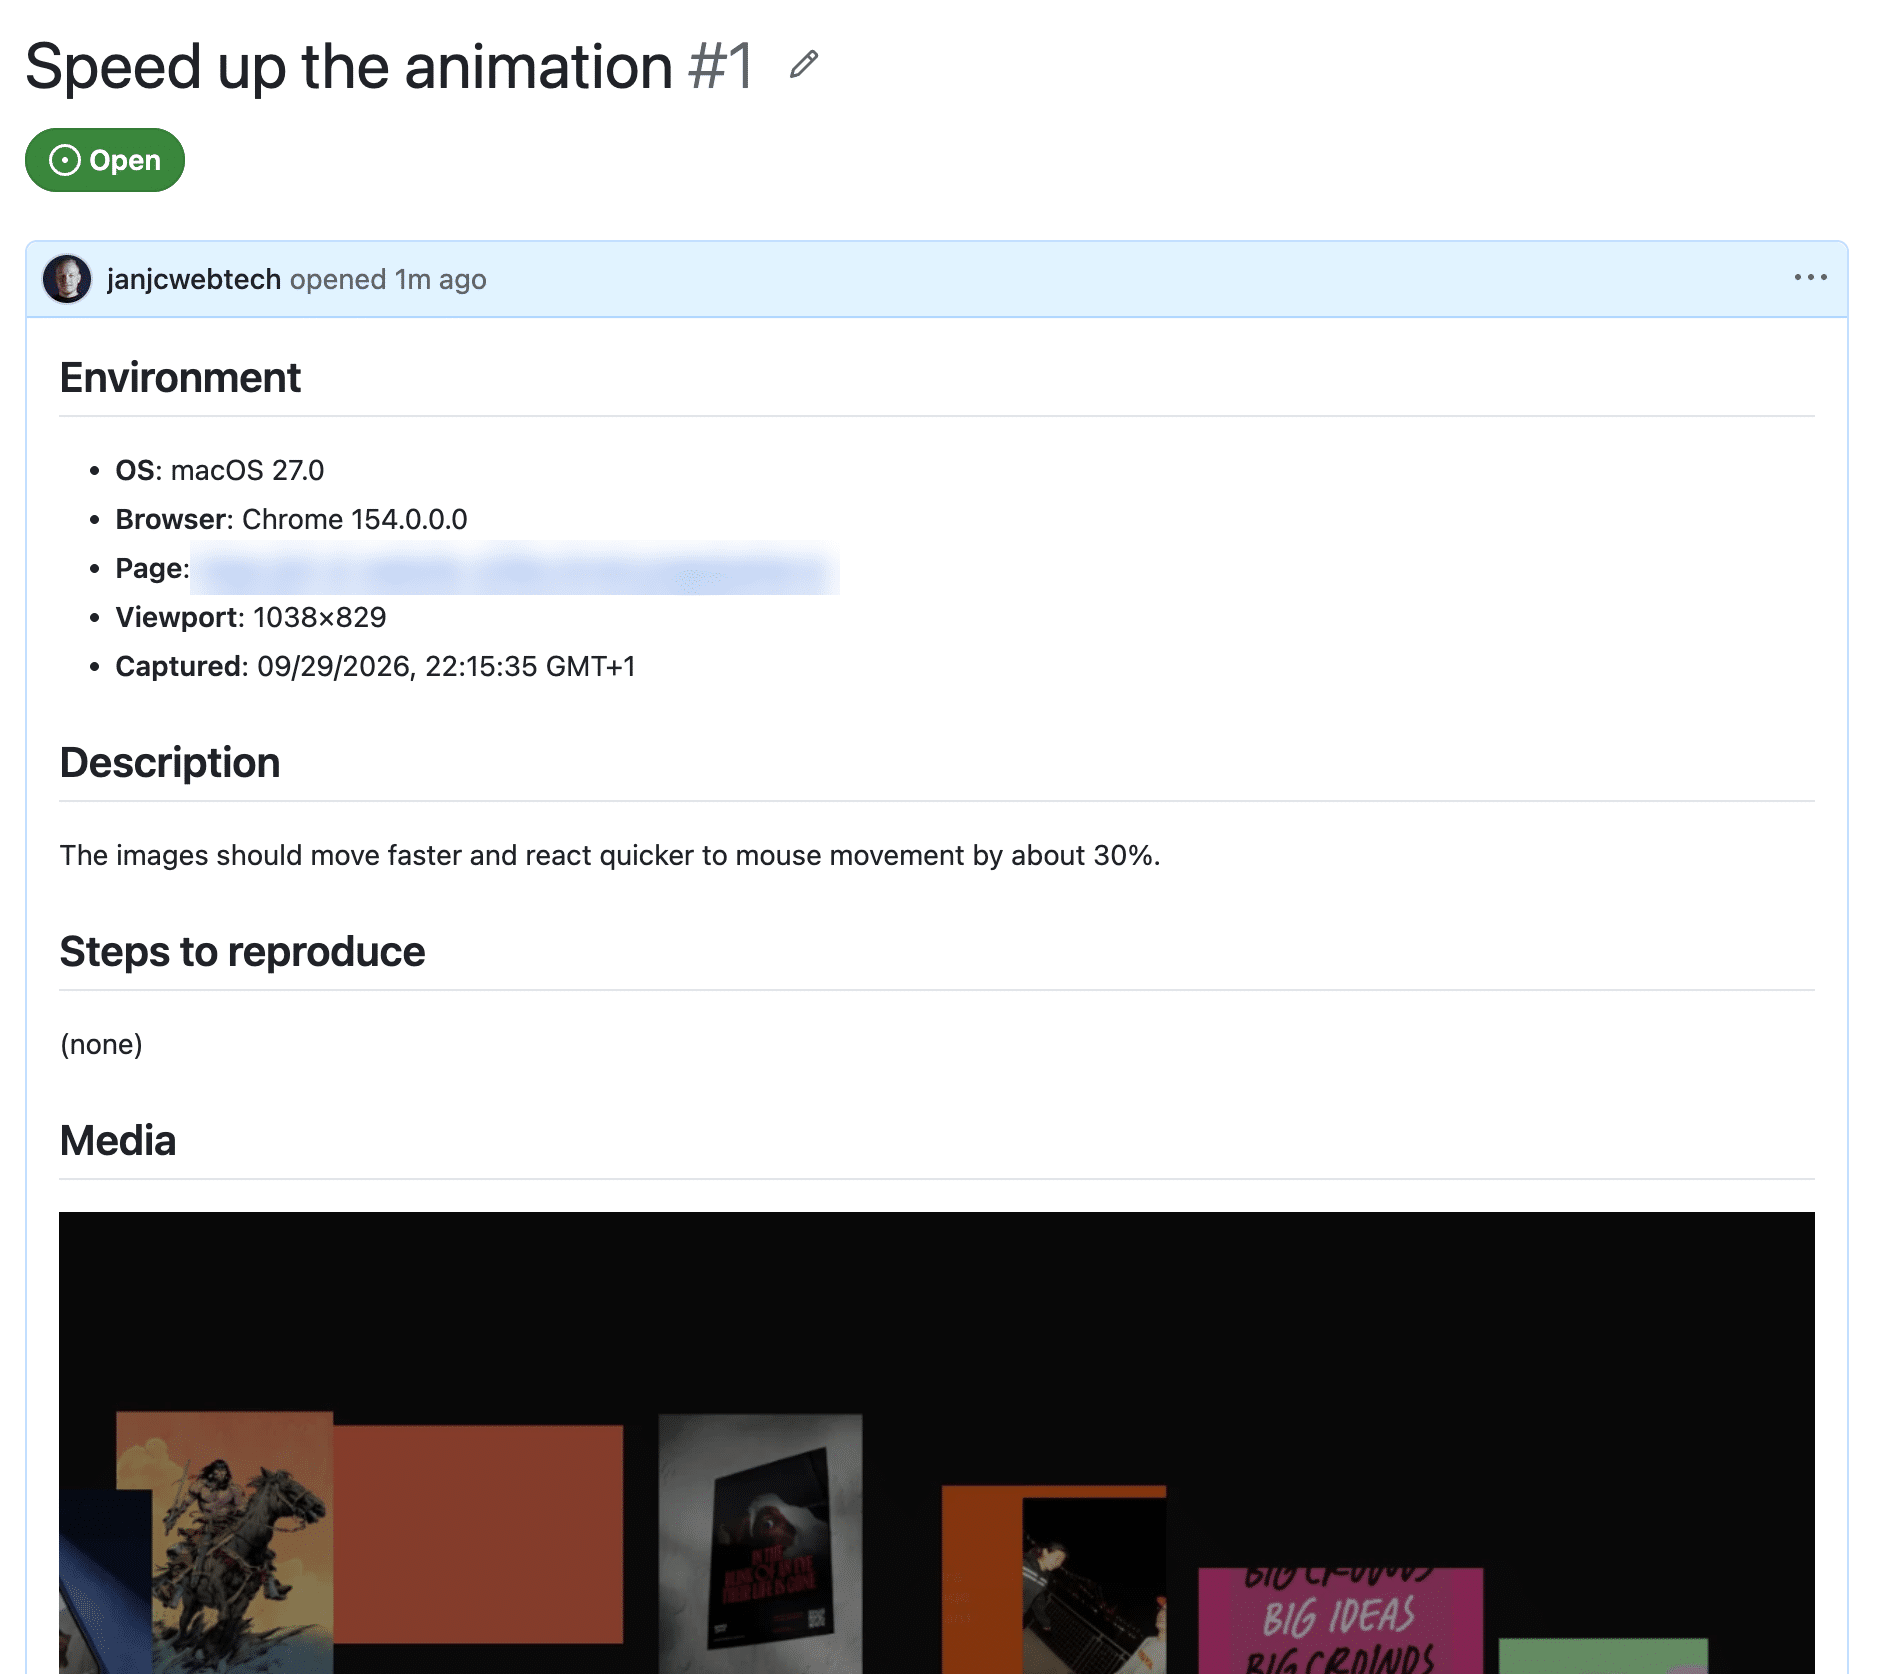
The finished issue: environment, description and screenshot in one place, ready to pick up.


Tip: one problem per issue. If you’re not sure it’s a bug, label it Improvement.
Troubleshooting
- Upload error: you’re probably signed out of github.com. Sign in and try again. BugShot won’t create the issue until the screenshot uploads.
- “Forbidden… Resource not accessible by personal access token”: you picked a repository other than the feedback one. Every fine-grained token can read public repositories, and BugShot lists everything the token can see, but it can only write to the feedback repository. Switch back to it.
Things to know
- Console and network logs start when you click. Anything before that isn’t captured.
- Anonymous usage events go to the developer: installed, opened, connected, issue submitted. No URLs or report content.
- It’s a one-developer open-source project, updated through the Chrome Web Store, so the wording in its panel may change.


